Emails Setup & Templates
Before you can send emails, you need to configure your email settings and templates.
Setup Emails
Section titled “Setup Emails”- Go to Emails & Templates > Settings
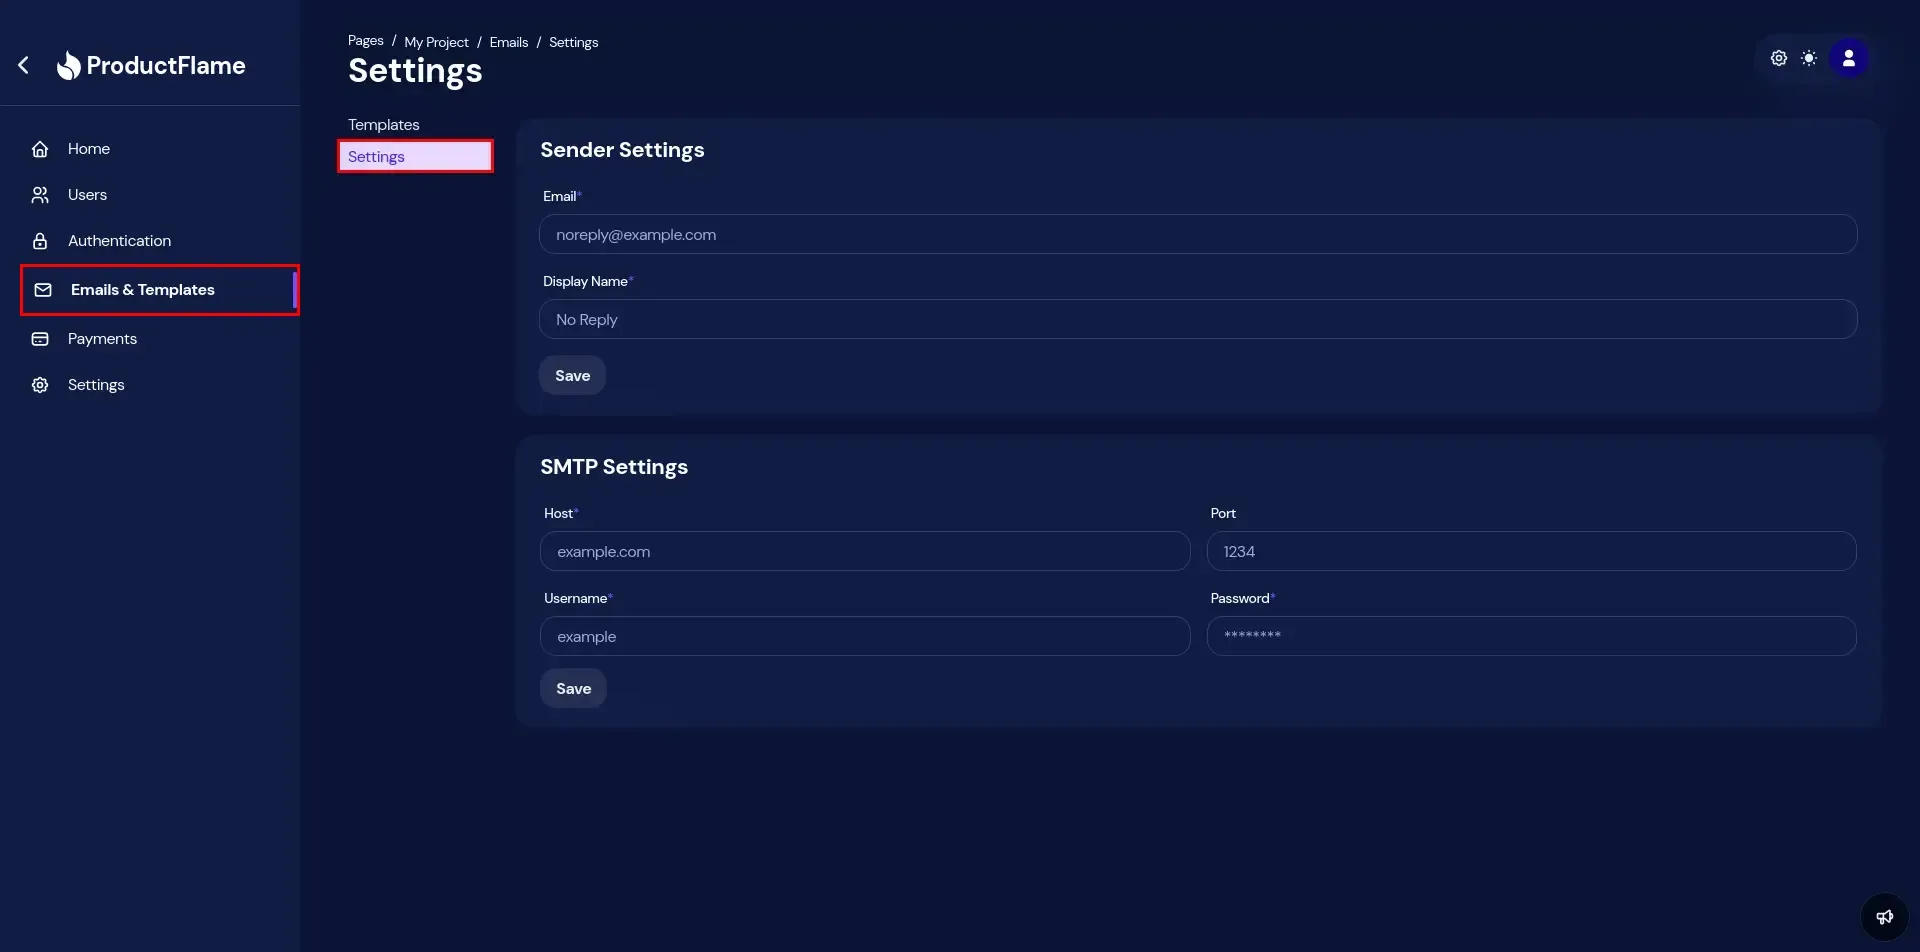
- Configure the Sender & SMTP settings with the following options:
- Email: The email from where the email will be sent (e.g.
noreply@example.com). - Display Name: The display name associated with the email (e.g.
No Reply). - Host: An STMP host (e.g.
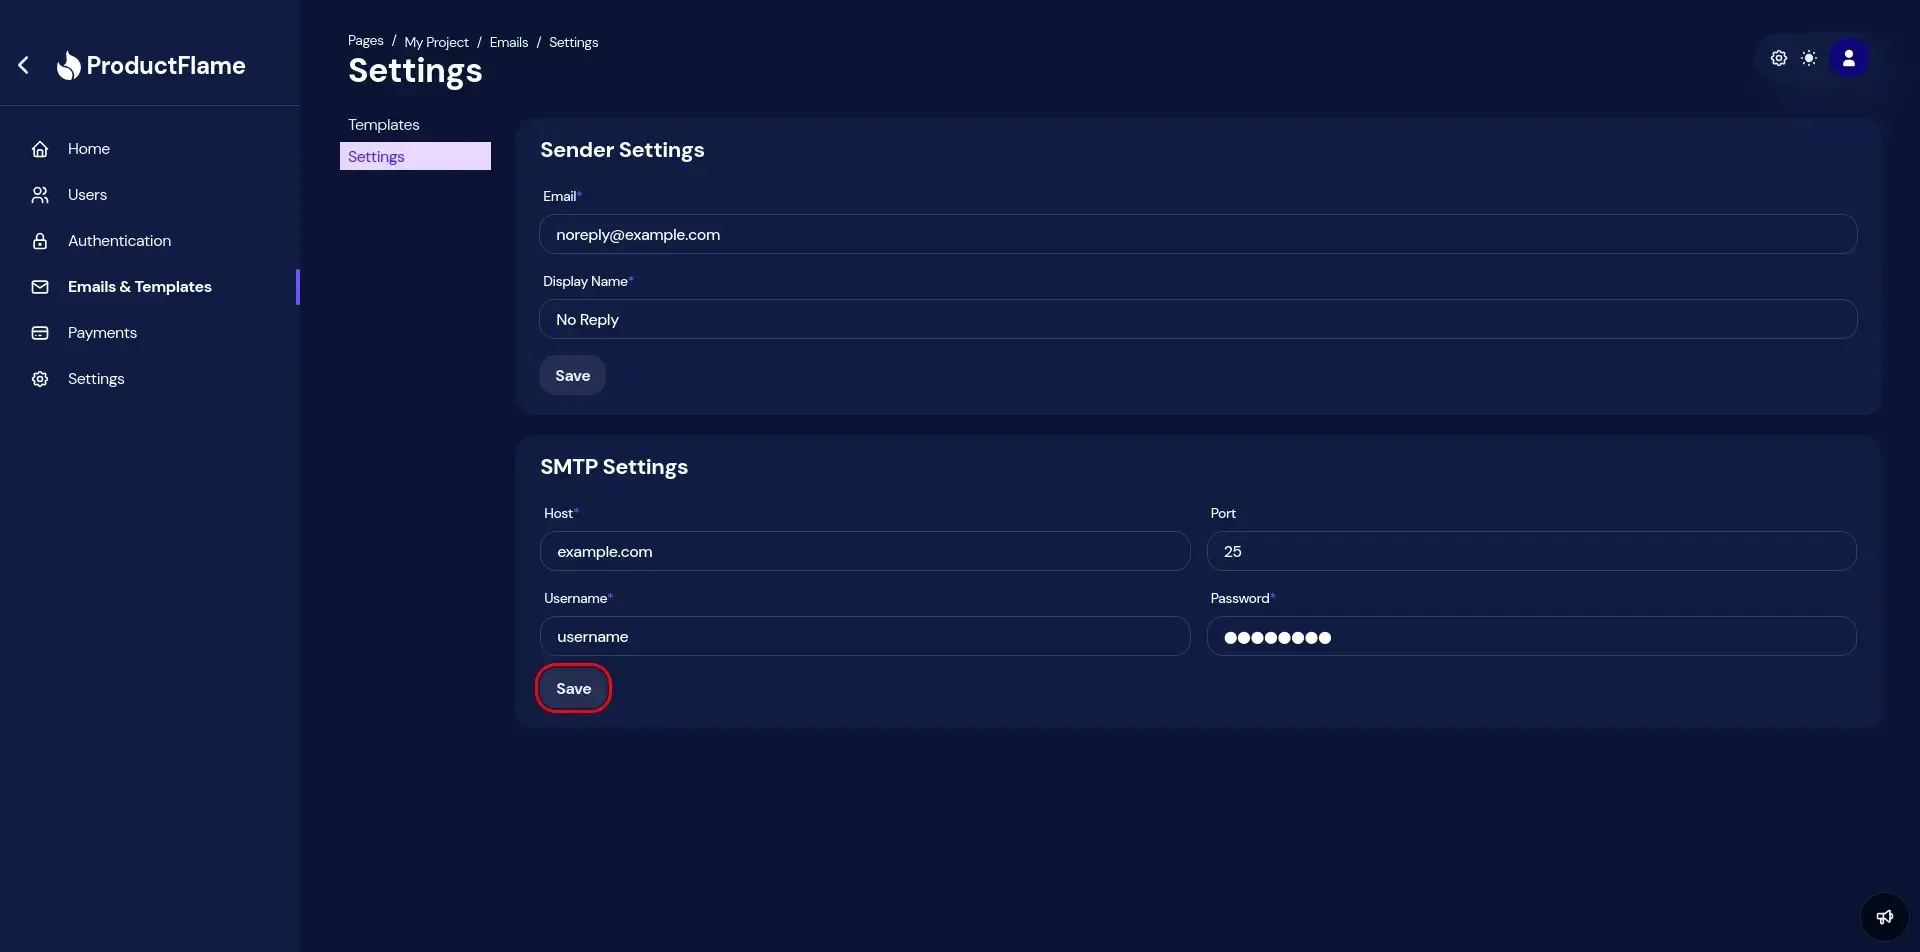
example.com). Usually or domain or a domain provided by your SMTP provider. - Port: An STMP port (defaults to
25). Most probably it is25, but your SMTP provider might assign another. - Username: Your SMTP username. Provided by your SMTP provider.
- Password: Your SMTP password. Provided by your SMTP provider.
After that, click save.
Templates
Section titled “Templates”Templates are useful tools for automating emails. They allow dynamic parameters, defined as {{parameter}}. Here is an example of a template:
<html> <head> <style> p { font-size: 25px; } </style> </head> <body> <!-- `name` is a variable parameter that will be replaced with a value before the email is sent. --> <p>Hello, {{name}}!</p> </body></html>Create a template
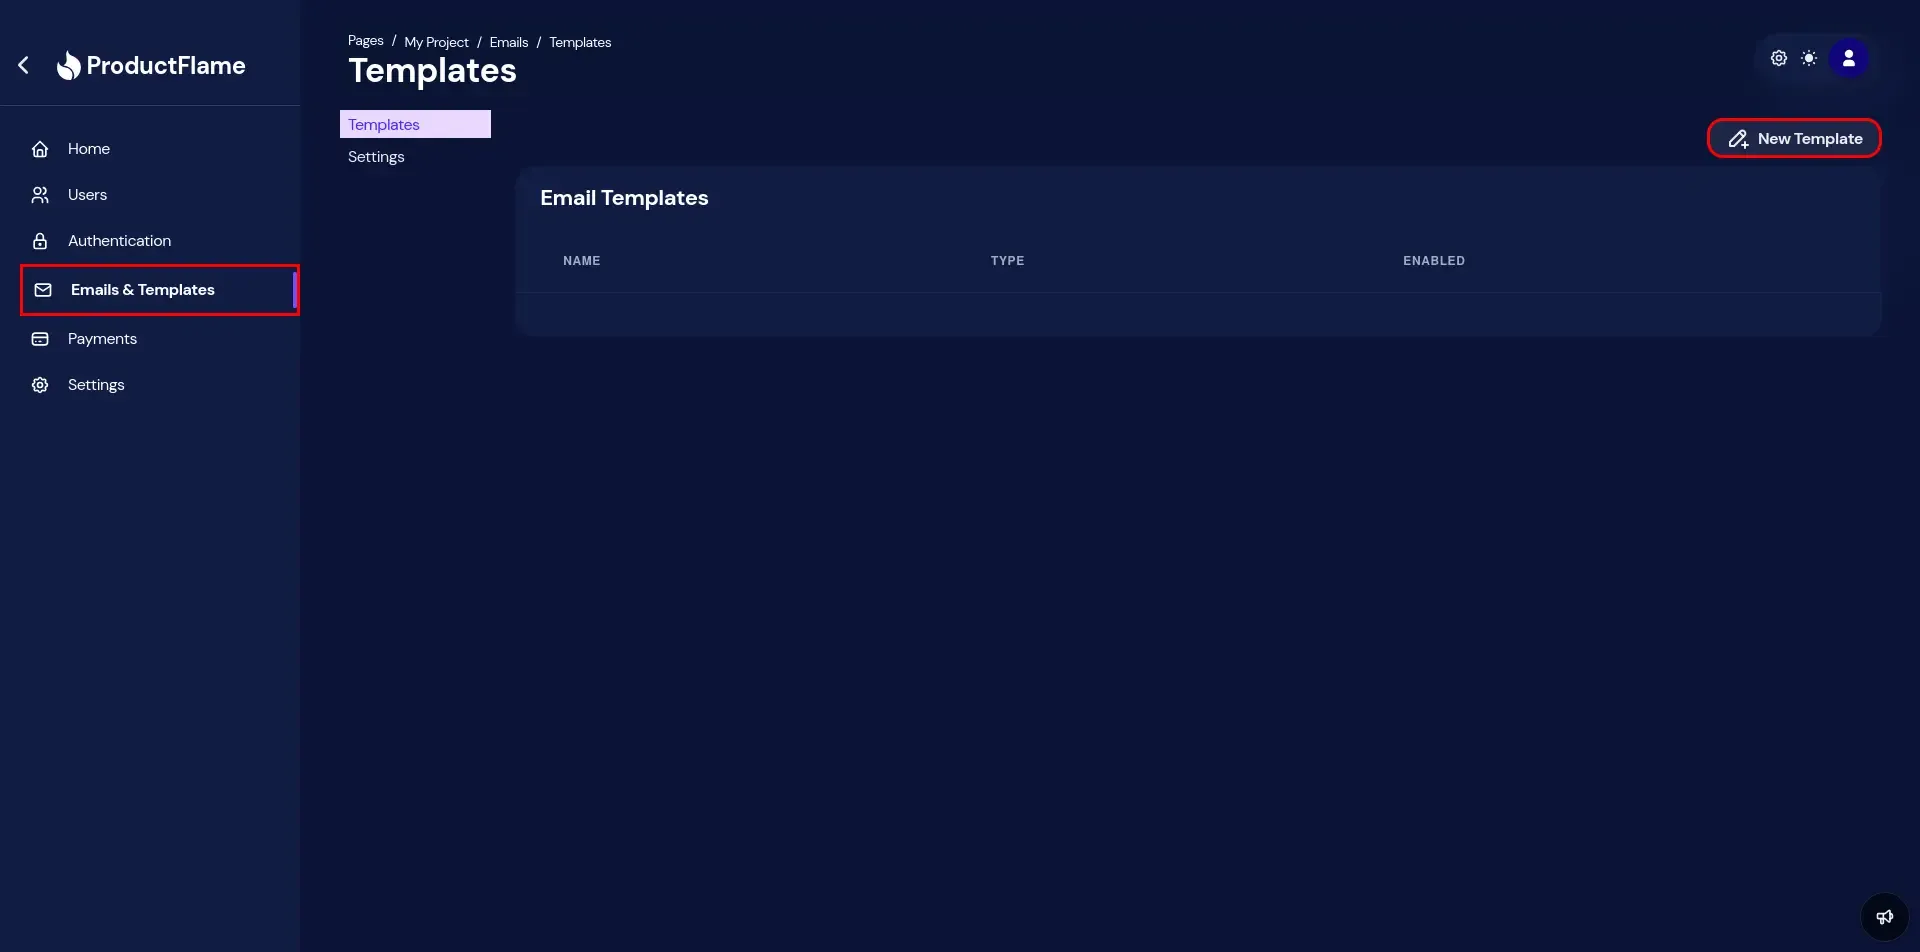
Section titled “Create a template”- Go to Emails & Templates > Templates and click the New Template button.
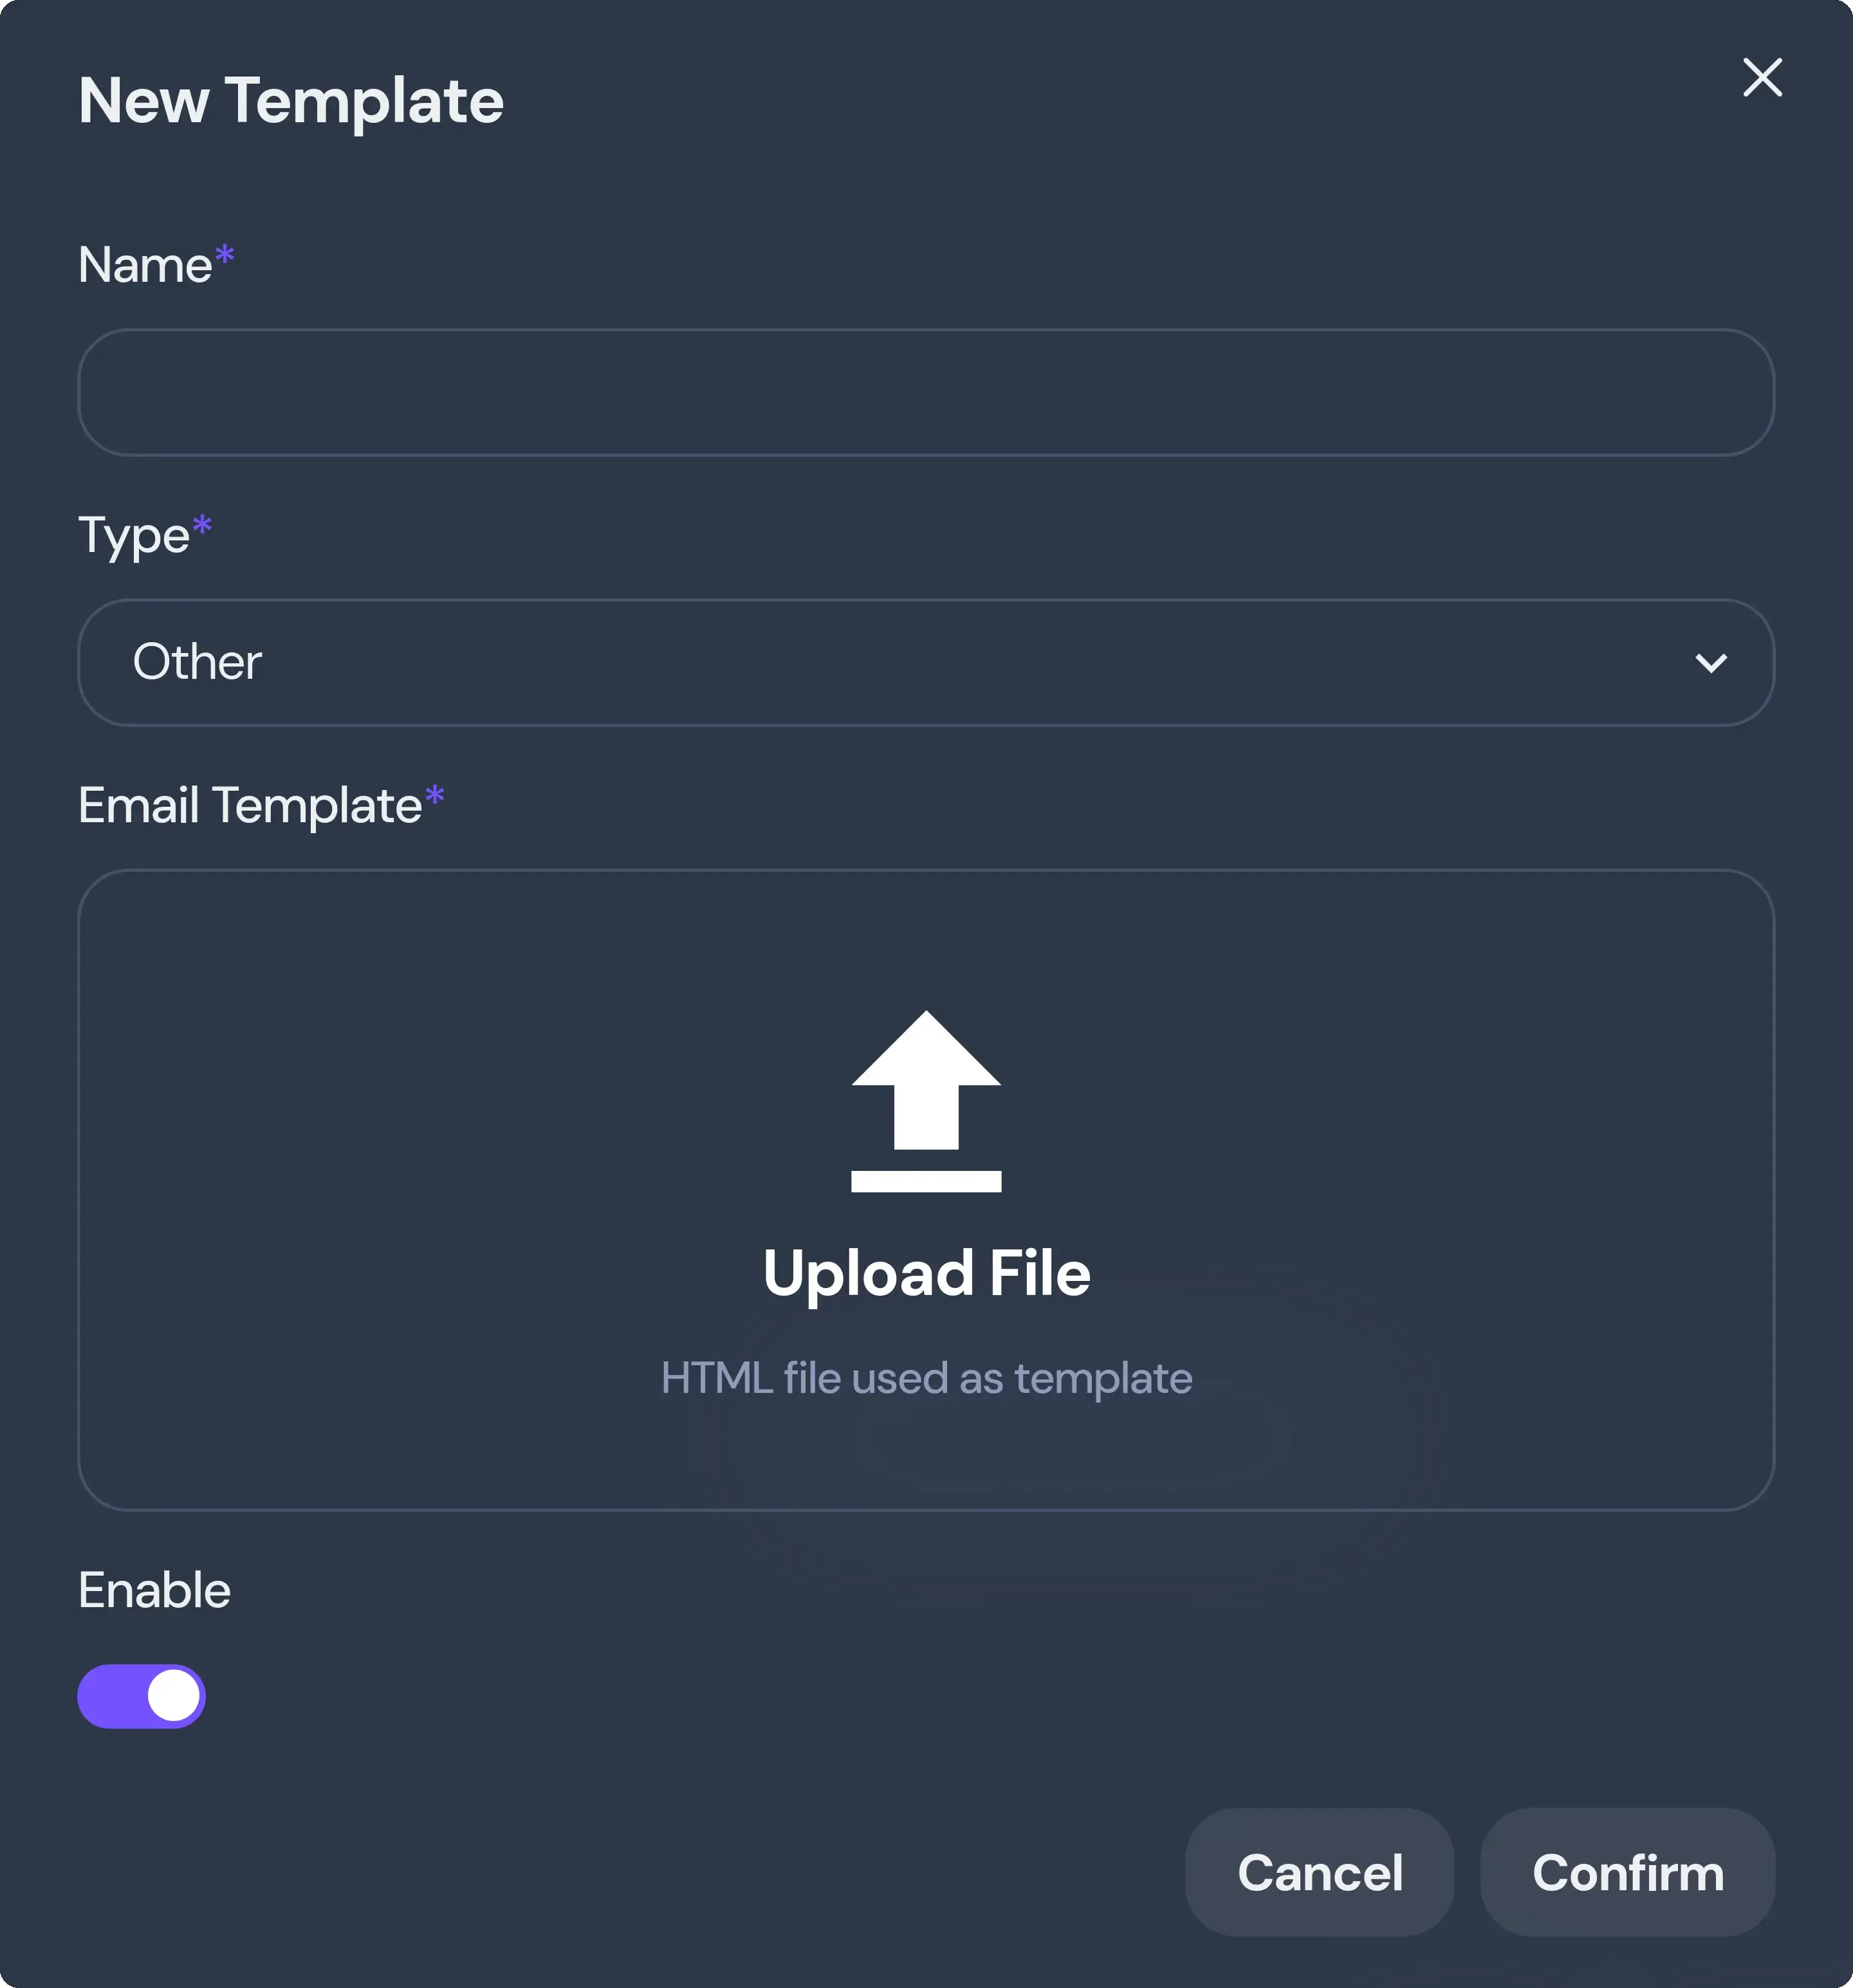
- The New Template dialog will be shown. From here you can create the template:
- Name: The name for your template. It must be unique among other templates.
- Type: Choose between
Activation Email,Password Reset Email, andOther. Depending on the selection, the appropriate template will be used for its specific purpose. - Email Template: Here you’ll upload your template as an html file.
- Enable: Enable or disable the template.