Setup Authentication
Authentication is essential for any product. It can be implemented using an email and password, or via a third-party service like Google or GitHub.
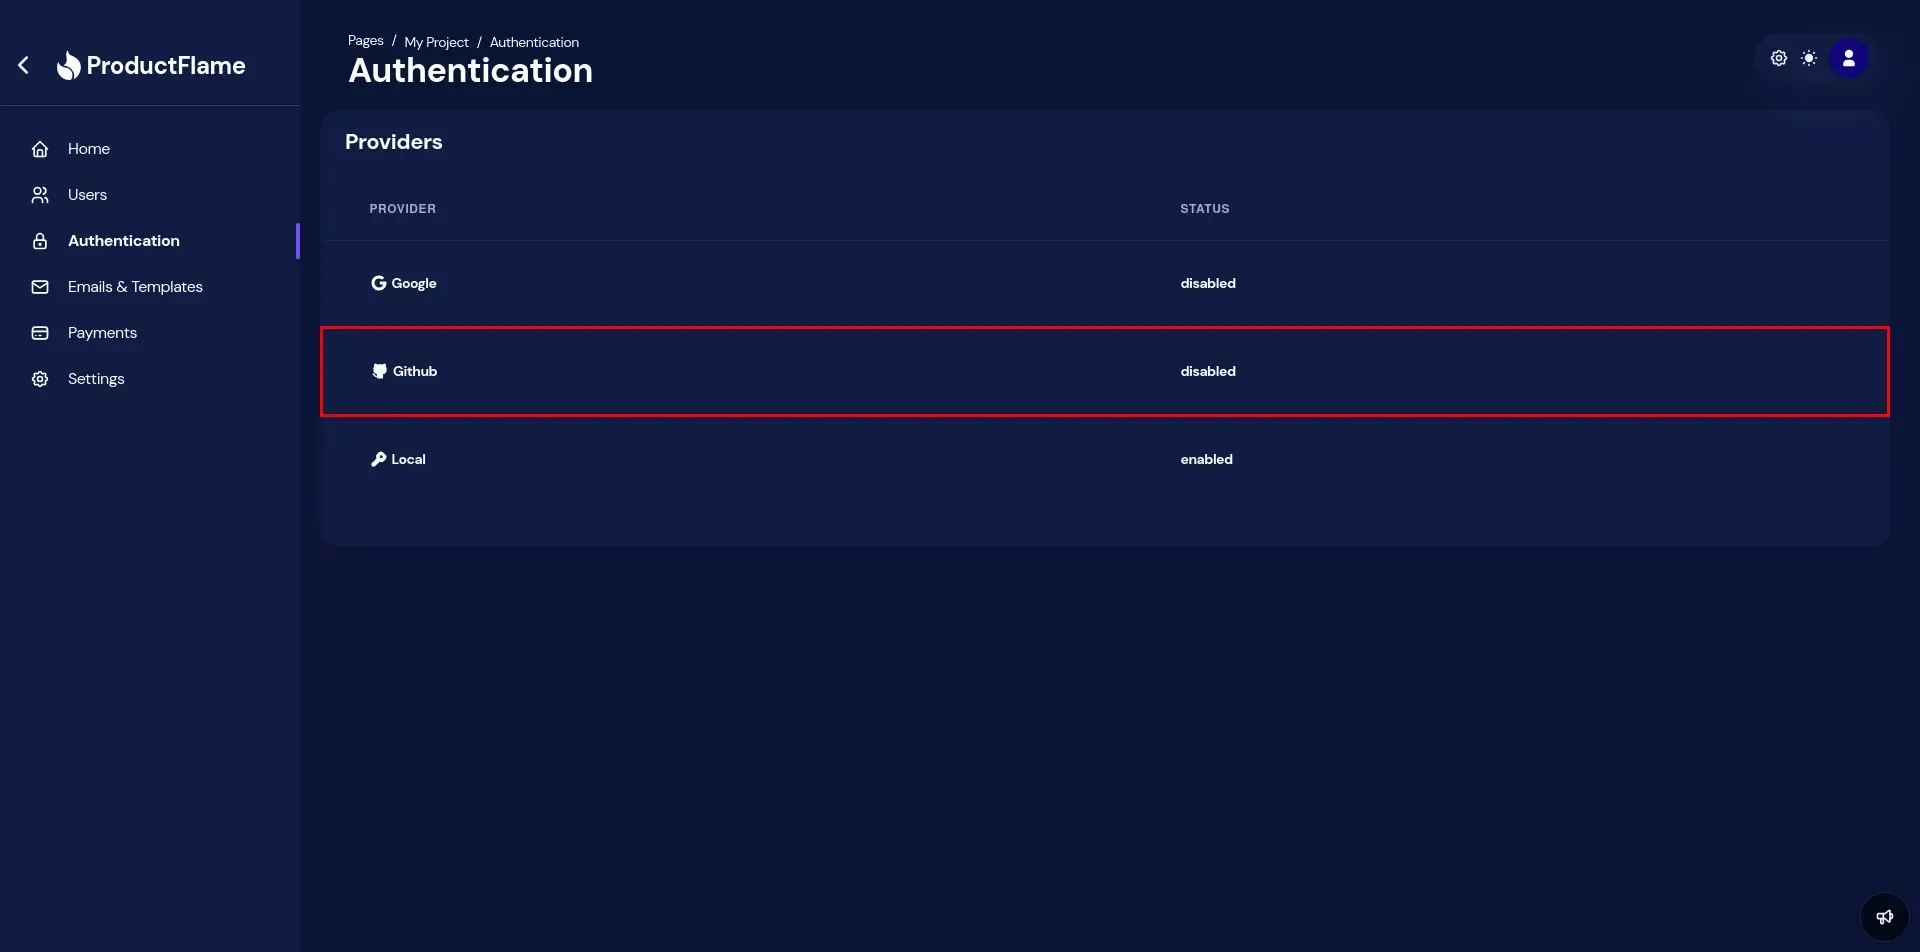
Before using any strategy, it must be configured beforehand.
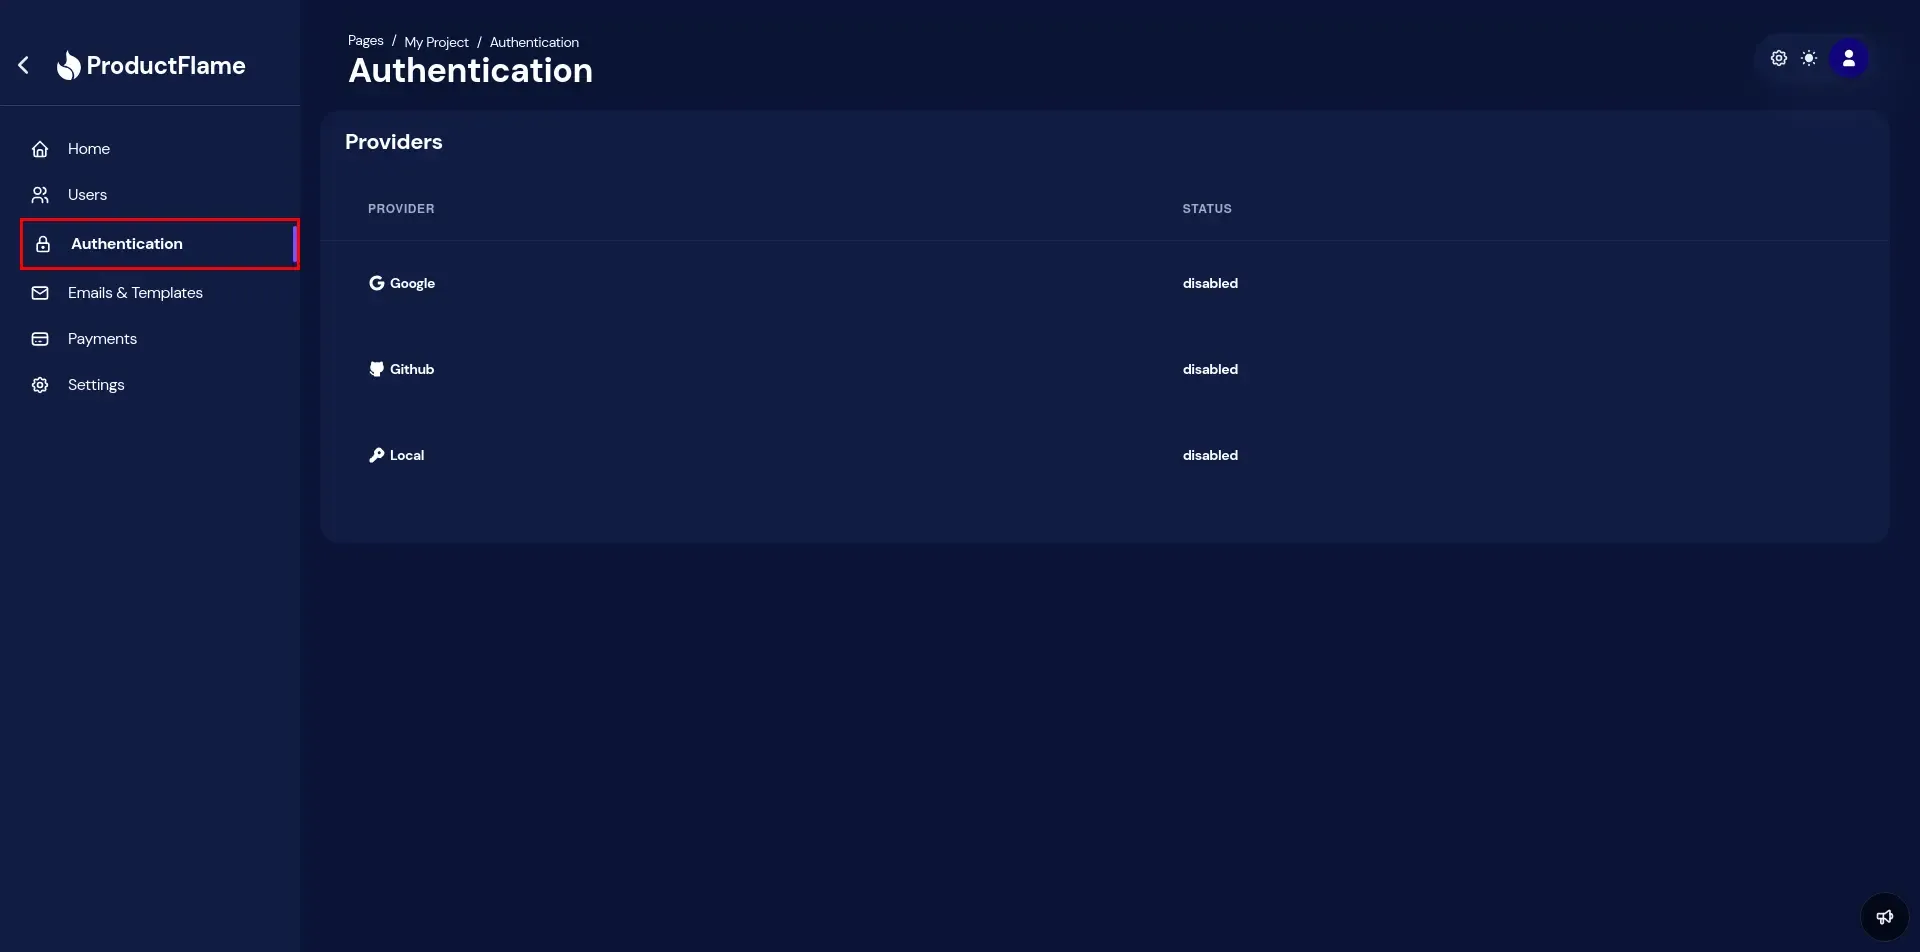
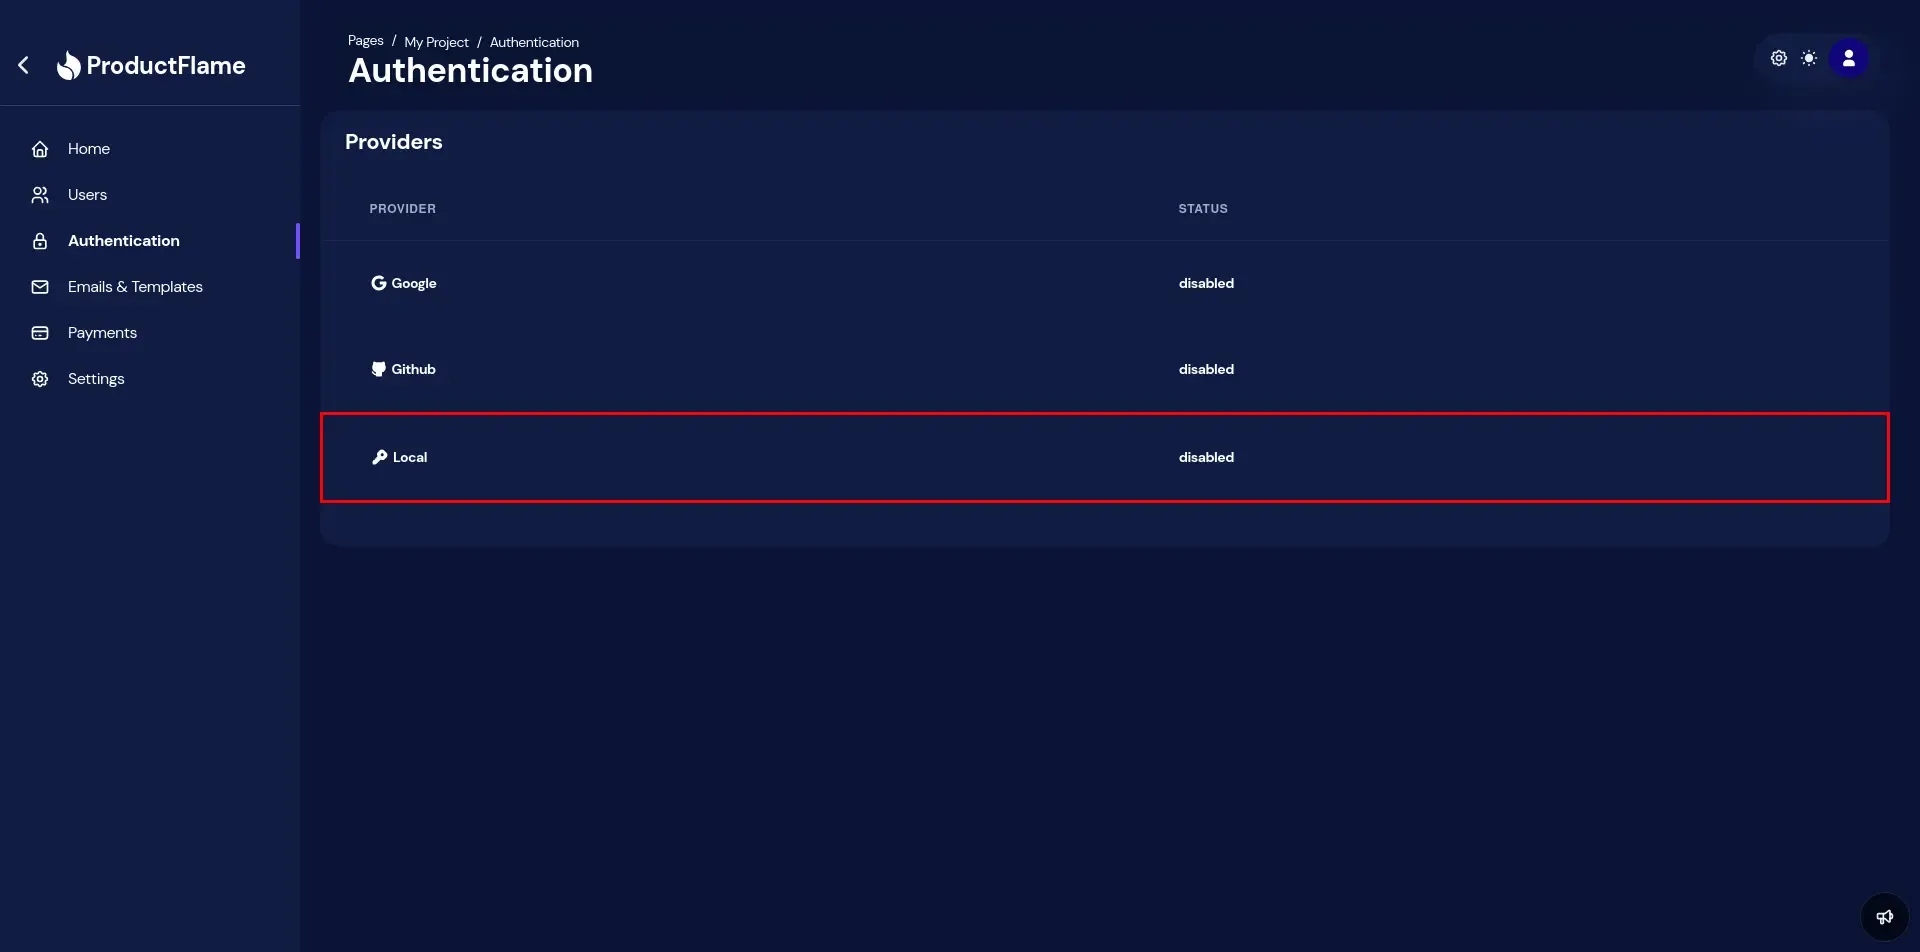
- Firstly, navigate to Authentication.
Setup Local Authentication
Section titled “Setup Local Authentication”Basic authentication is made through an email and password.
- Select Local.
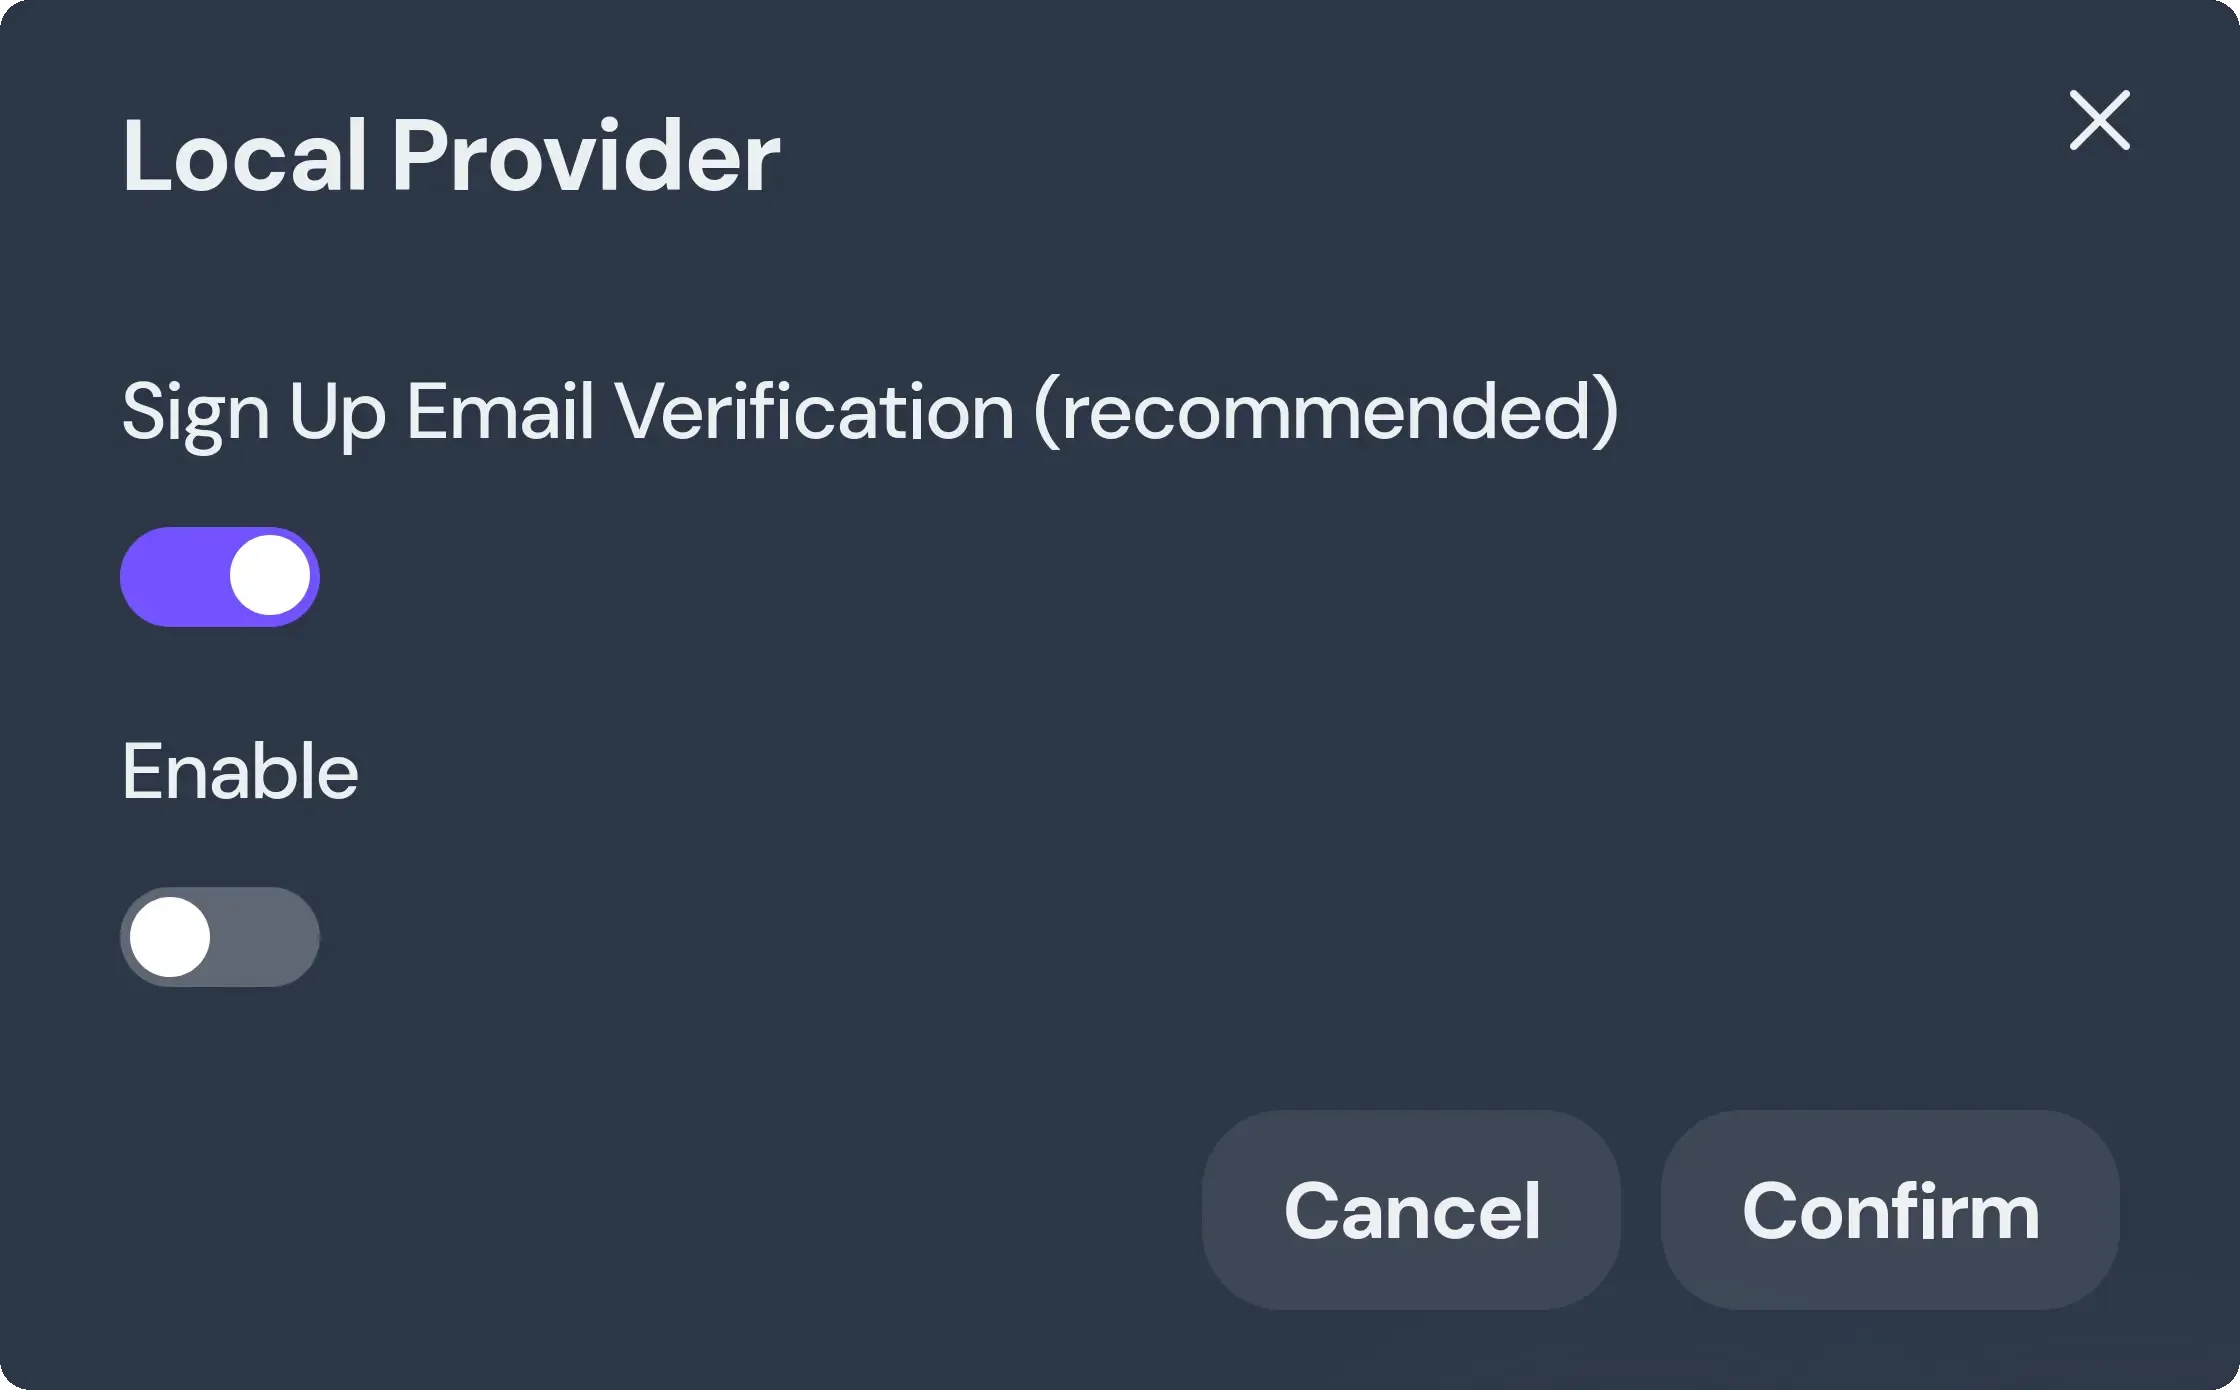
- Now you can configure the Local Authentication:
- Sign Up Email Verification: Require email verification before creating the account. If enabled, email settings must be configured an
Activation Emailtemplate have to be enabled. - Enable: Enable or disable the Local Authentication.
Setup Third Party Authentication
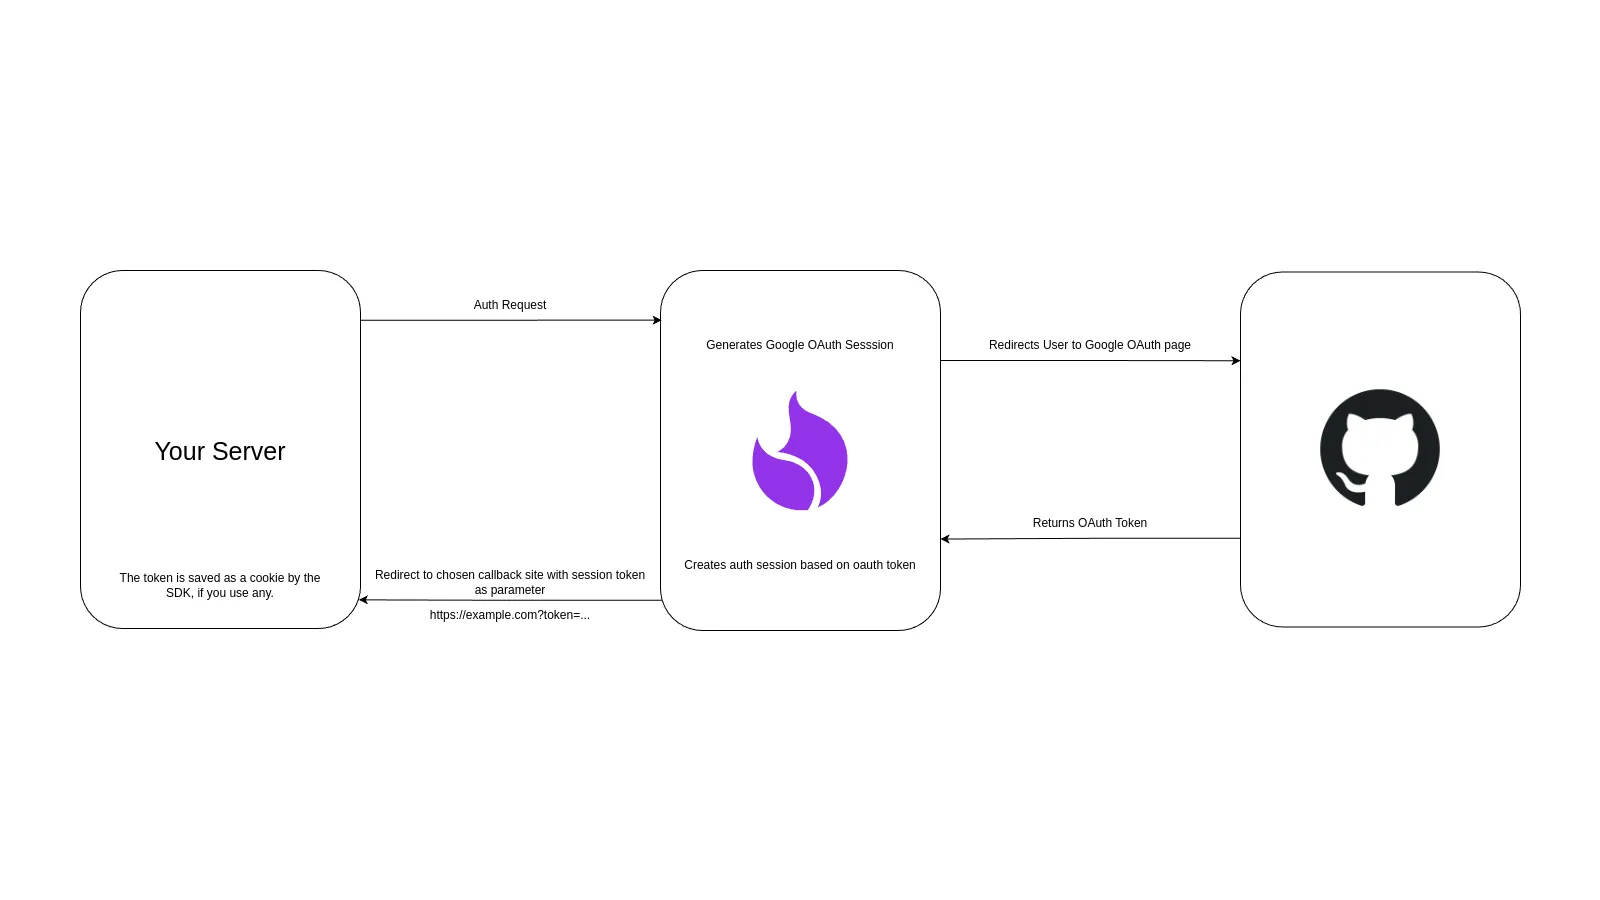
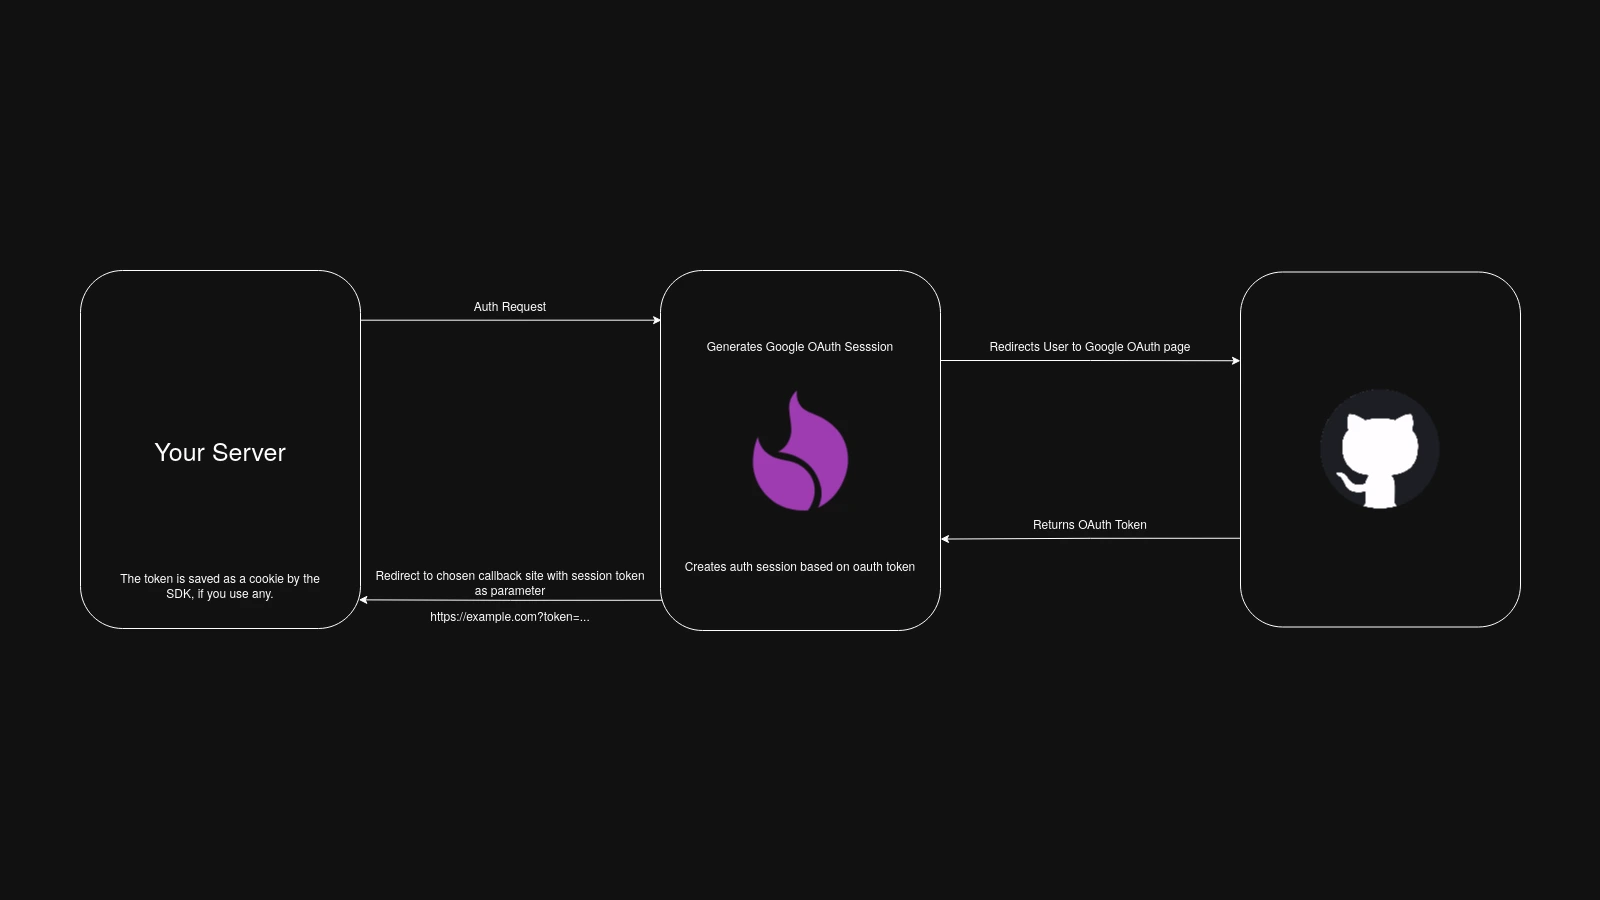
Section titled “Setup Third Party Authentication”Third party authentication is one of the easiet and straighforward methods of authentication.
Google OAuth
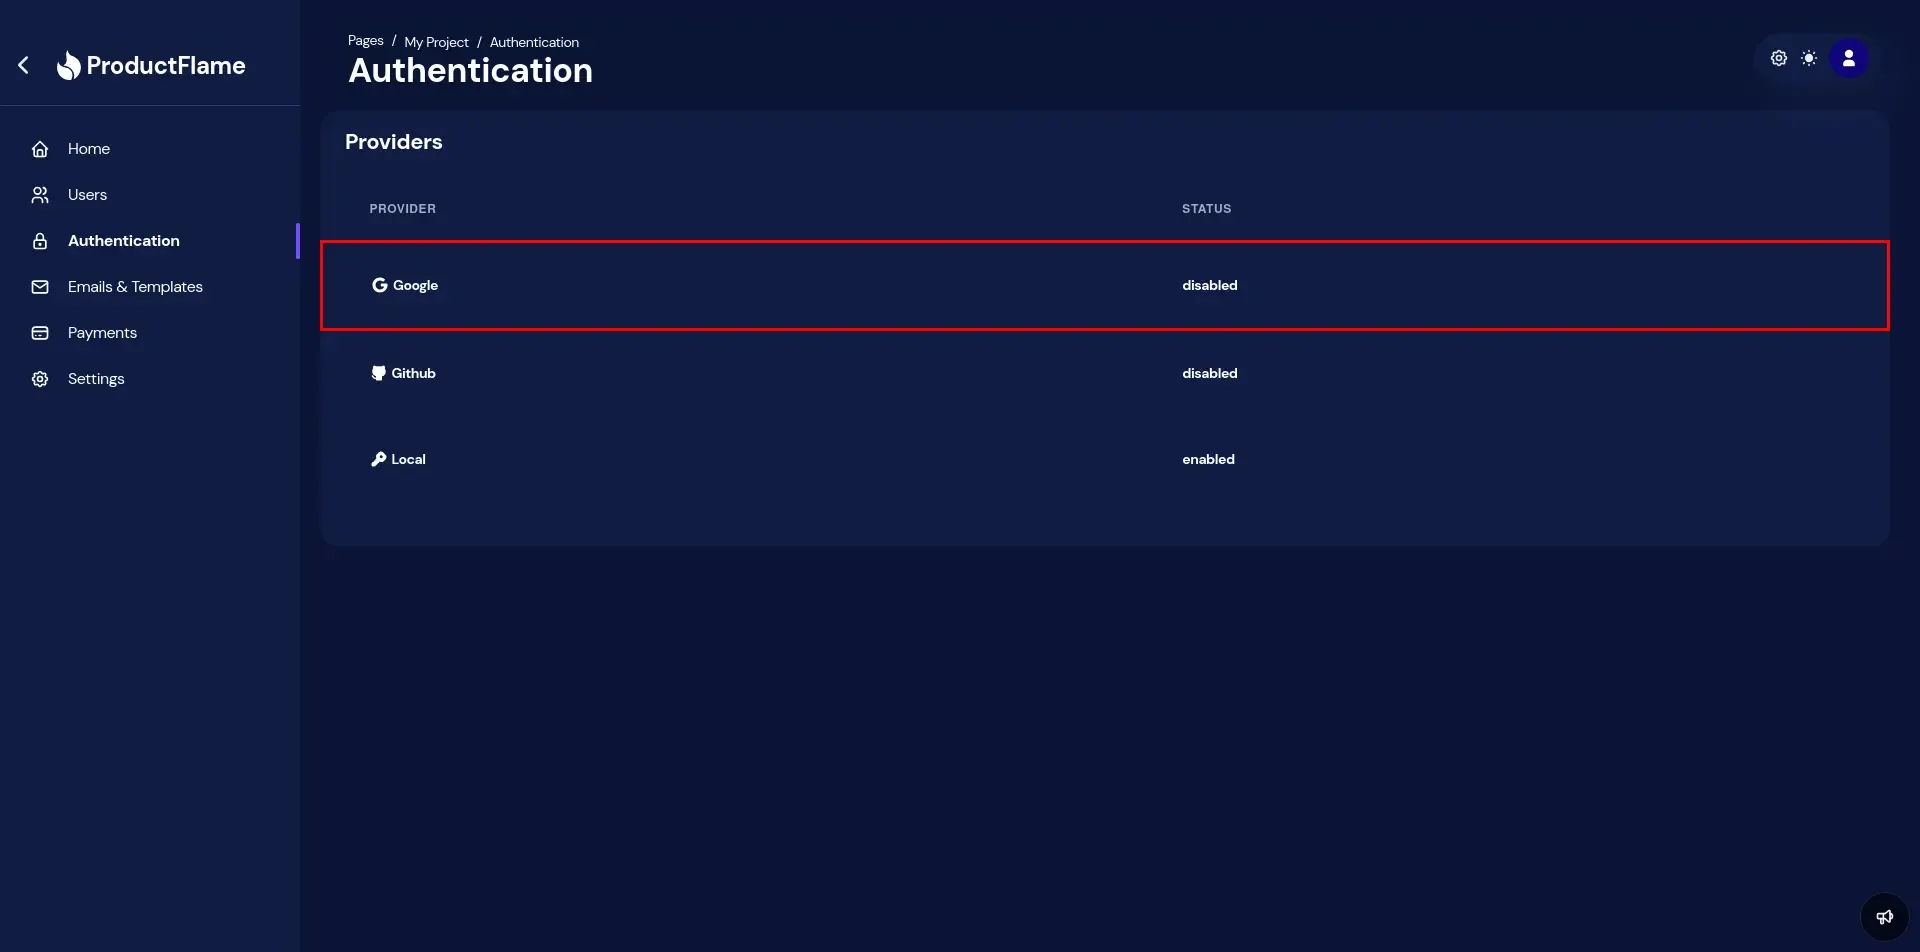
Section titled “Google OAuth”- Get your Client ID and Client Secret from Google Cloud Console.
- Configure the Google Authentication:
- Client ID: The client id from Google Cloud Console.
- Client Secret: The client secret from Google Cloud Console.
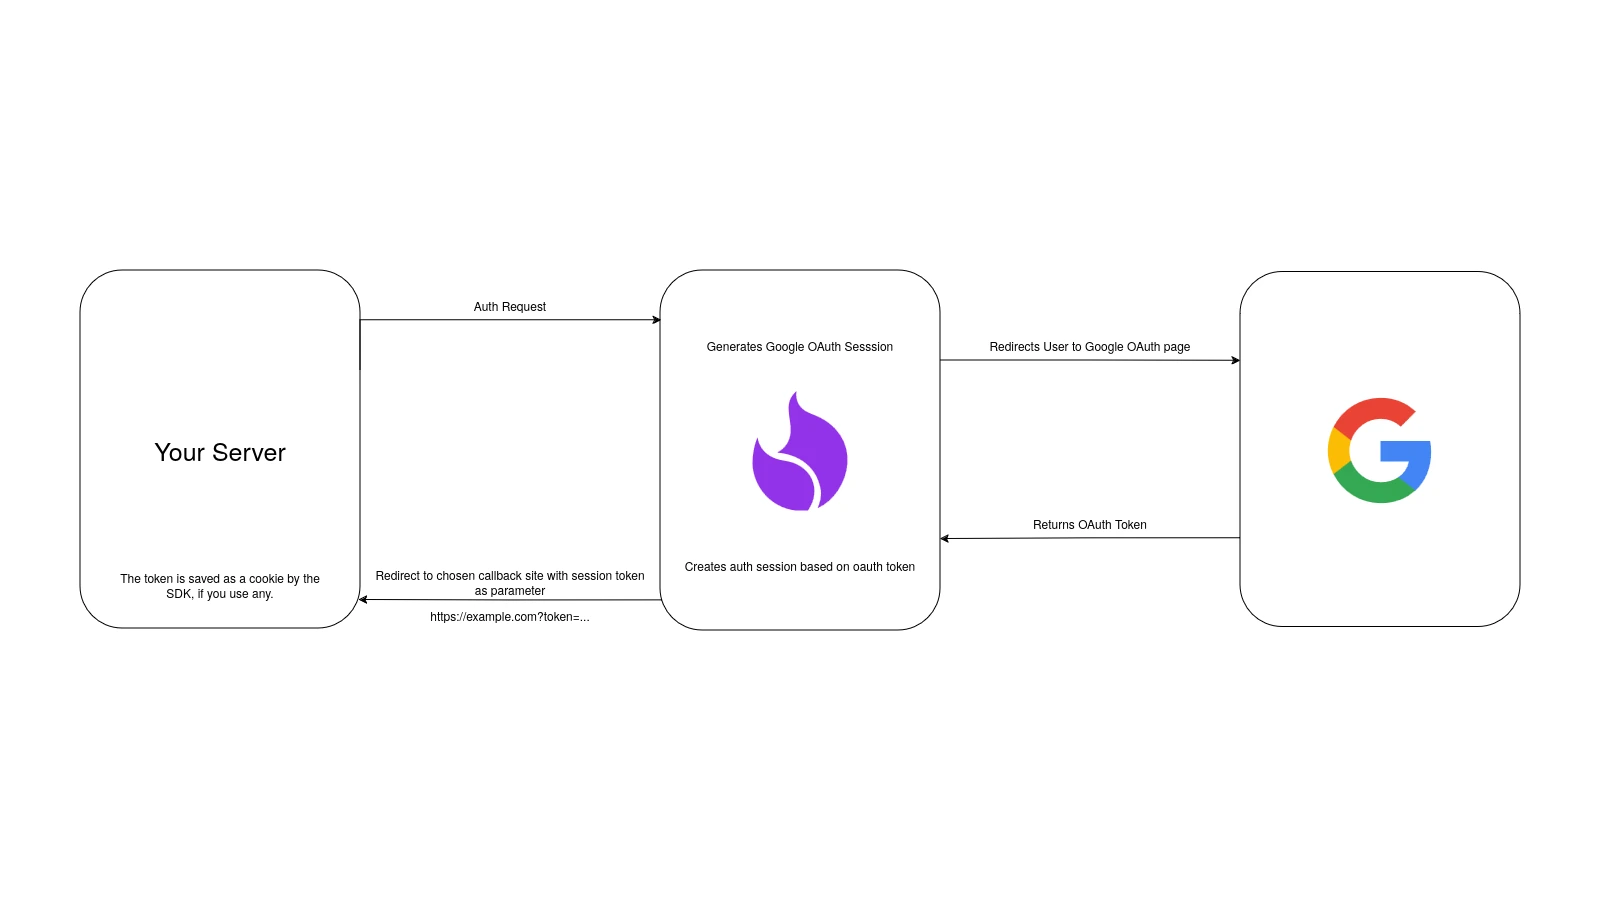
- Callback: An url where the user will be redirected after a successful authentication.

Github OAuth
Section titled “Github OAuth”- Create and setup a Github App. Below is a video demonstrating how to do this.
- From ProductFlame dashboard, configure github authentication.